

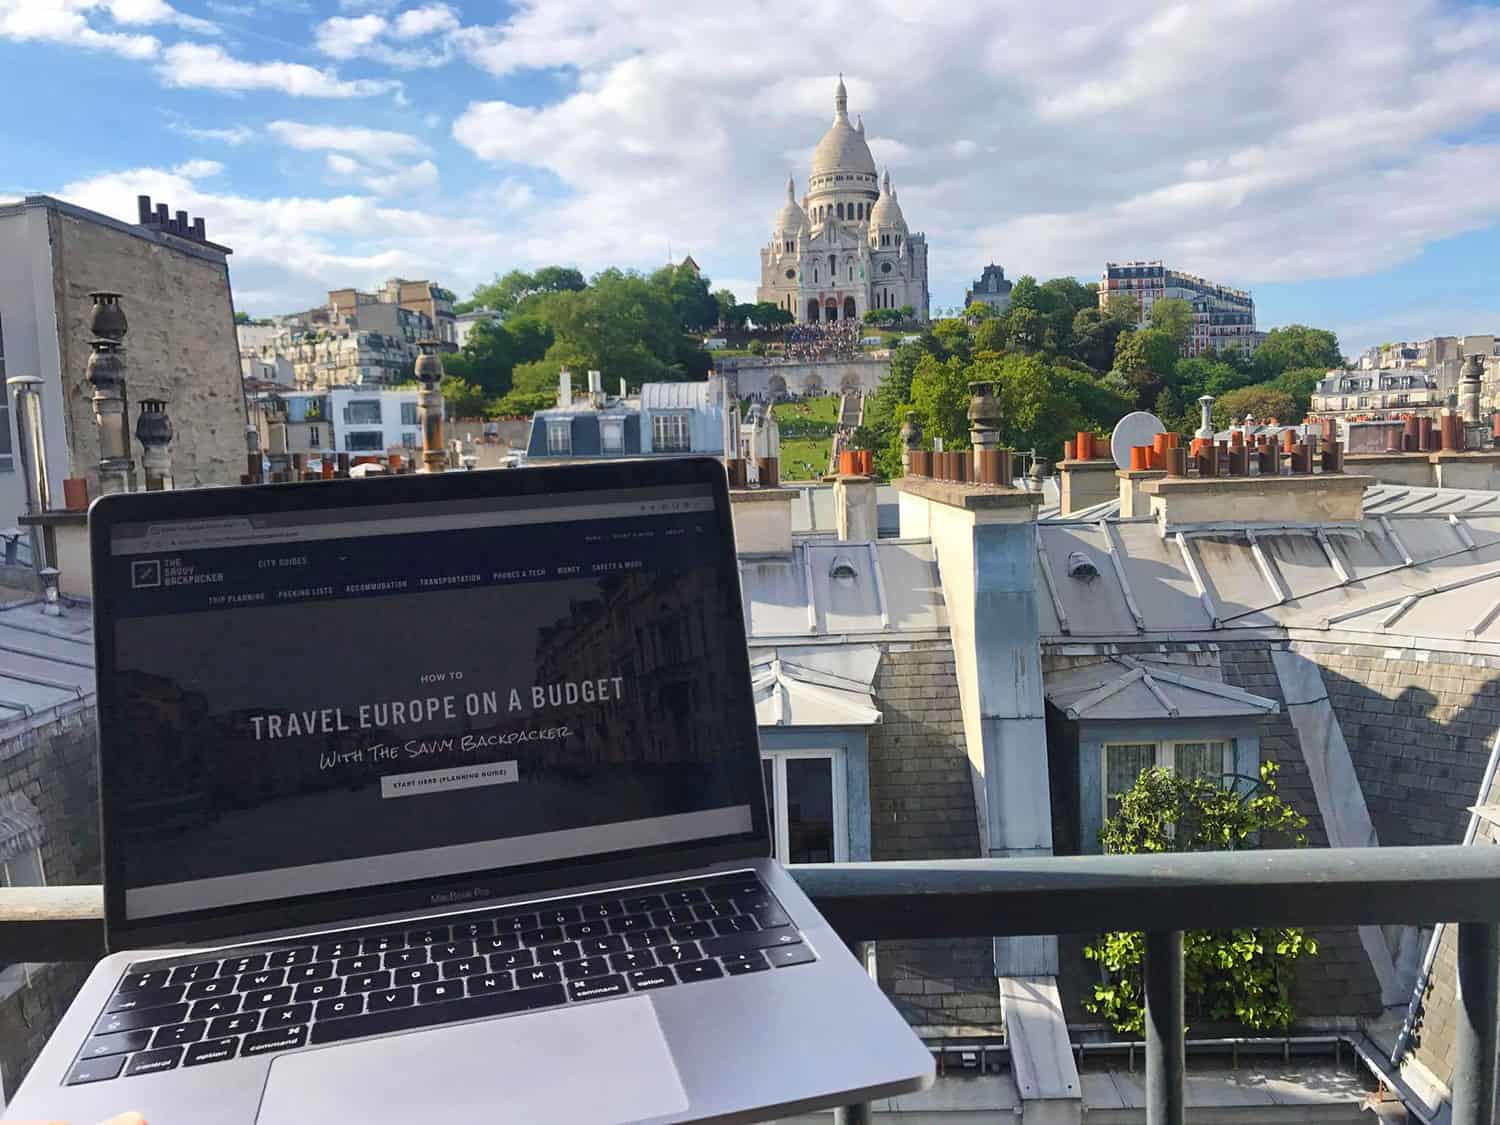
I created The Savvy Backpacker in 2010 and now it receives nearly 3,000,000 visitors a year. It’s also earned enough money to help fund our travels across Europe. In this guide, I’ll tell you how to start a travel blog and give you the strategies we use to make money from our website.
This is a no-nonsense guide. Everything is 100% free. (Want to support us? Click here)
Who Is This Travel Blogging Course For?
This isn’t one of those “how to start a travel blog in 8 easy steps” kind of guides.
This is an in-depth guide for those of you who want to start a travel blog the right way — no shortcuts here.
We’ll cover everything from the technical aspects to creating your blog to marketing, SEO, growth strategies, and earning money.
NOTE: My expertise is in travel blogging so there are lots of travel blogging references, but the lessons laid out in this course apply to any blog type — lifestyle, fashion, beauty, etc.
First, Let’s Get Real About Blogging
Just sit back and imagine it… traveling around the world, blogging about about your travels, and earning enough money to pay for everything. That’s the dream many travel bloggers have.
Well, it ain’t that easy.
Most people earn next to nothing from their blog and only a few make a full-time income. In fact, you might have to pay out-of-pocket when you first start.
On average, it takes about two years to earn money from a blog. Furthermore, the travel blogging sphere is crowded and dozens of new blogs are created every day.
I don’t mean to scare you away, but it’s important to be realistic because there are multiple websites claiming you can make thousands of dollars blogging (and their “secrets” usually cost a pretty penny).
But now some good news!
Travel blogging is in its infancy and people are always hungry for awesome content. There are opportunities for bloggers who produce awesome writing, photos, videos, and other entertaining information. Furthermore, companies and tourism boards are finally starting to see that bloggers can be a valuable marketing tool — so there are bound to be more opportunities for bloggers.
So, with a lot of hard work, it is entirely possible to earn enough money to help fund your travels. And who knows, maybe you too will join the ranks of the top travel bloggers that make enough to travel the globe from their writing.
Setting Realistic Travel Blogging Expectations
Let’s get real for a second.
Serious blogging takes a lot of work and dedication.
Writing articles is very time-consuming. Editing photos and writing takes way longer than you’d expect. Don’t forget to add social media work and emails. Whew… before you know it you’ve got yourself a full-time job. Ask any successful blogger and they’ll all tell you the same thing.
It takes a long time before you start seeing any progress or gains in traffic. This website took 18 months before it made a dime — and even then I was only making a few bucks a month. Staying motivated after spending countless hours working for no reward is very tough.
Even if you do stay motivated enough to keep blogging regularly, it doesn’t mean you’ll make a ton of cash. Very few bloggers make more than a few hundred dollars a month (we’ll discuss the finer details of making money from your blog later in this article). There are other perks like free products or going on free press trips — but even then, you’ll end up paying for some stuff out-of-pocket, and trips like these aren’t easy to come by.
Another problem with travel blogging is the initial cost of traveling. Remember, most travel bloggers don’t see any earnings for at least a year, so you must first save a decent amount of savings to travel long enough before you get your blog off the ground.
Want to know another secret? A large majority of travel bloggers are actually “digital nomads” — which means they work remotely doing jobs that can be done anywhere like web development, graphic design, programming, editing, consulting, etc. That is what pays the bills… not travel blogging.
But it can be rewarding, and if you’re dedicated, it is certainly possible to start something successful.
But Enough about all that! Let’s get started.
Choose Your Blog Name and URL
Picking a name can be a challenge simply because so many names and URLs are already taken.
Spend some time thinking of names that encapsulate the subject of your blog or something about you — you might have to get creative. Your name is a big part of your “brand” so don’t rush this step.
I spent a solid two weeks thinking of my blog name. Head to dictionary.com or thesaurus.com to get ideas. Take a look at other travel blogs to see what other people use for their name as that might help inspire you.
More tips for choosing a blog name and URL:
- Try to keep it short (I kind of failed on this one).
- Avoid hyphens if possible (the-savvy-backpacker.com wouldn’t be ideal).
- Check for similar names that might confuse your readers.
- A .com address is the best. Personally, I would avoid using anything else.
- Don’t use hard-to-spell words (people misspell “savvy” all the time so I failed again on this one).
- Try to make it memorable.
- Check social media profiles to see if they are available.
- Try to avoid two-word names where the last and first letters of the words are the same — i.e. Travel Lovers – travellovers.com.
Once you have some names, start plugging them into NameCheap.com to see if the URL is available. If not, keep chugging away.
Buy Web Hosting and Domain Name
A lot of new bloggers start off using a free service like Medium, Blogger, Tumblr, etc. But I think this is a mistake. Sure, they’re free but your content is going on their platform. They own it. They’re ultimately in control.
But when you host your blog you’re in control. You don’t have to play by anyone’s rules. And, most importantly, it shows that you’re serious about turning your blog into a business.
You need two things to get started in creating your own blog:
- Web Hosting: The service where all your website’s files/articles/photos/videos are stored online.
- A Domain Name: What people type in to find your site — i.e. yourwebsite.com
Choosing A Web Host
Think of web hosting as your home on the internet — it’s where all your stuff like photos, files, videos, etc. are stored.
Most web hosts offer multiple levels of web hosting. As a new blogger, you’ll be fine with the lowest/cheapest level — which should be $4-$10/month. You can upgrade later if your site becomes popular and you need a more robust service, but there is no use in wasting a bunch of money on hosting you won’t use.
For reference, we spend about $1,500/yr on hosting but we didn’t have to upgrade from the cheapest option until at least two years after we started.
Things to look for in a web host:
- Types of Hosting — There are two main types of hosting options.
- Shared Hosting — This is the most affordable hosting and it’s the best option for new blogs. You’re basically sharing a server with multiple other websites. The main downside is the potential for your site to be slower because you’re sharing resources with other websites.
- Virtual Private Servers (VPS) — VPS is faster and more powerful than shared hosting but it’s more expensive — it’s what we use for The Savvy Backpacker but we didn’t upgrade until we were getting 100K visitors a month. VPS is a little more complicated so non-tech savvy folk might need to pay extra for managed support.
- Bandwidth — Many come with unlimited bandwidth, but I wouldn’t worry too much about this until you have a lot of traffic.
- Storage Space — A few Gigs of space should be enough at first.
- Reliability — Most sites claim 99.9% uptime.
- Quality Tech Support — It’s nice to have tech support who will help take care of any technical issues.
- 24/7 Tech Support — It’s also nice to be able to reach tech support at any time.
- Automatic Backups — More robust hosting gives you daily website backups.
- Optimized for WordPress — Some hosts are specifically set-up for WordPress websites (we’ll talk more about WordPress later).
Web Host Options
There are literally thousands of web hosting providers, but some a much better than others.
SiteGround — SiteGround gets excellent reviews for being cheap, reliable, and having solid customer service. Prices start around $4/month so it’s hard to beat these guys.
WPEngine — Are you super serious about your website? WPEngine is a great choice because they’re optimized specifically for WordPress so your site should load super fast. They also offer a bunch of other great services that you won’t find with cheaper web hosts (CDN, backups, a staging environment, etc). They’re also a lot more expensive. Their plans start at $30/month and go up from there.
Buy Your Domain Name
Next, you need to purchase your domain name (.com, .net, etc.)
A .com domain name usually costs about $12/year. You can also by a .net, .co, .us, etc, but a .com is always my top recommendation.
It’s best practice to purchase your domain name from a different company than your hosting because it’s usually a little cheaper. Personally, I find that it’s simpler to buy everything from one service because you avoid the hassle to having to connect your domain name and your web hosting.
My favorite domain register is NameCheap.com because they’re not shady like GoDaddy.com.
Set Up/Install WordPress
WordPress is a super powerful blogging and website content management system — there are a few other blogging platforms but WordPress is the way to go. Even better, the WordPress software is totally free.
I run WordPress for my blog and just about every blogger uses it too (so does CNN, The New York Times, Forbes, UPS, BBC America — just to name a few). Another great thing about WordPress is that most web hosts provide super easy “one-click” WordPress installation, so it’s really easy to set up. And because it’s the most popular blogging platform, there are a TON of tutorials online if you need help with something.
Additionally, WordPress has thousands of themes (free and paid) that enable you to easily change the look and feel of your blog. We’ll talk more about themes later.
Installing WordPress
Once you’ve signed up for hosting and have your domain setup, it’s time to install WordPress onto your web hosting account. Don’t worry, it’s pretty easy on most hosts.
For this example, we’re going to follow screenshots from SiteGround’s WordPress installation process. Your host might have a slightly different process but if they use cPanel (which nearly everyone does) it probably looks nearly identical.
NOTE: SiteGround also has a WordPress Wizard which installs WordPress in about three clicks.
FIRST: Login to your web hosting account (aka cPanel). It will look something like the image below.

Next, scroll down to the Softaculous button which is usually located in the “Software Services” section.

Look on the left until you find “WordPress”. Click it.

Click Install.

Next, you have to fill in a few details like title, description, username, and password, etc. It’s all pretty straightforward.
A few notes…
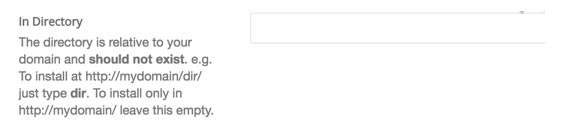
I recommend keeping the “In Directory” section blank.

Don’t use “admin” as the Admin Username. Choose something harder to guess. And make sure you actually choose a tough password. There are bots constantly trying to gain access to WordPress sites so a good admin and password are crucial.
GREAT WORK! WordPress should now be installed!
Go ahead, check your website. It probably looks something like this…
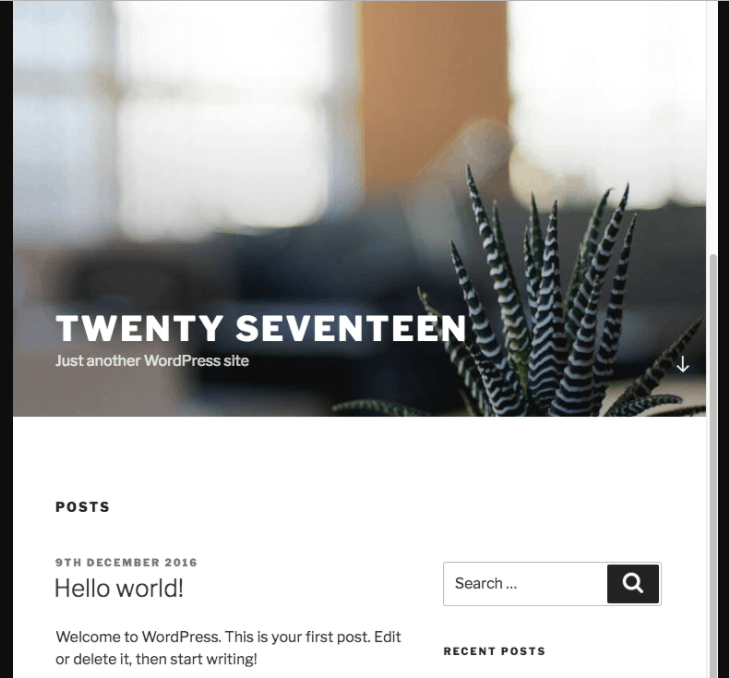
As you see from the above photo, the default theme is kinda boring but don’t worry, because we’ll talk about configuring and customizing your blog in the next few sections.
Configuring WordPress
Now it’s time to start configuring your WordPress blog.
Access Your Blog
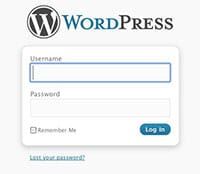
In your web browser, type your-domain-name.com/wp-login.php
This will bring up a login box where you will enter your username and password.
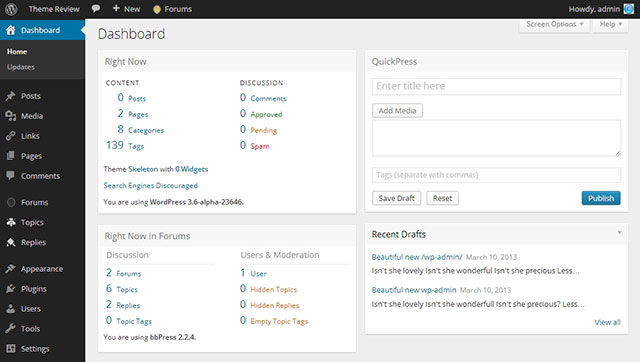
Once you enter your credentials, the WordPress Dashboard will come up. This is the command center for your blog, and it’s where you control everything about your site. Feel free to poke around this area. Click on stuff. See what happens. That’s the best way to really learn about your new WordPress website.
Next, it’s time to do some configurations.
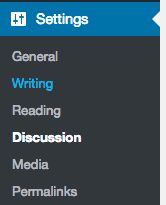
Go to the settings tab and click on “General”
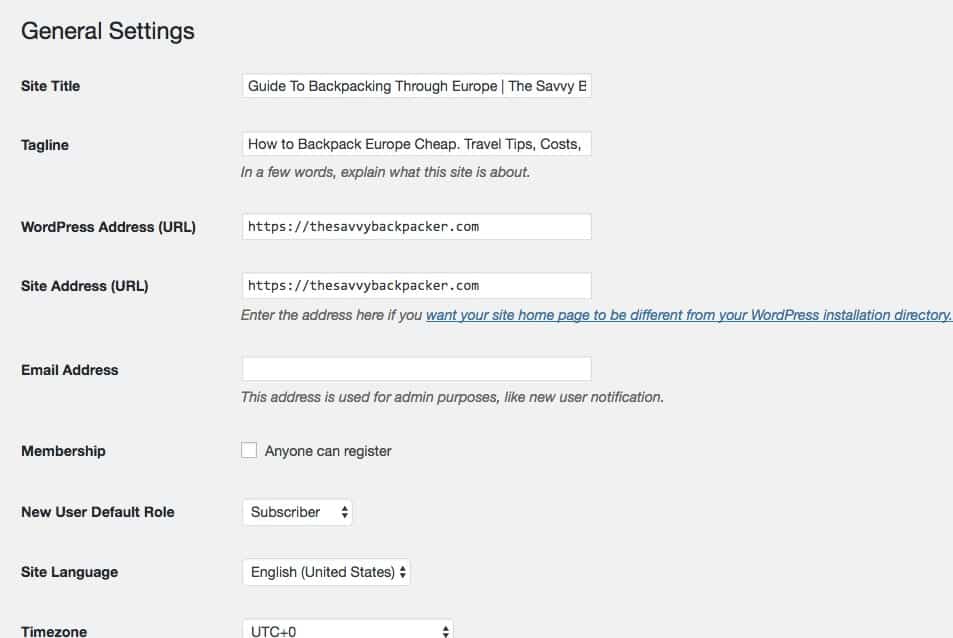
The most important things are the Site Title and Tagline. You can always change these in the future but it’s good to fill something in now. Set the other settings as you see fit.
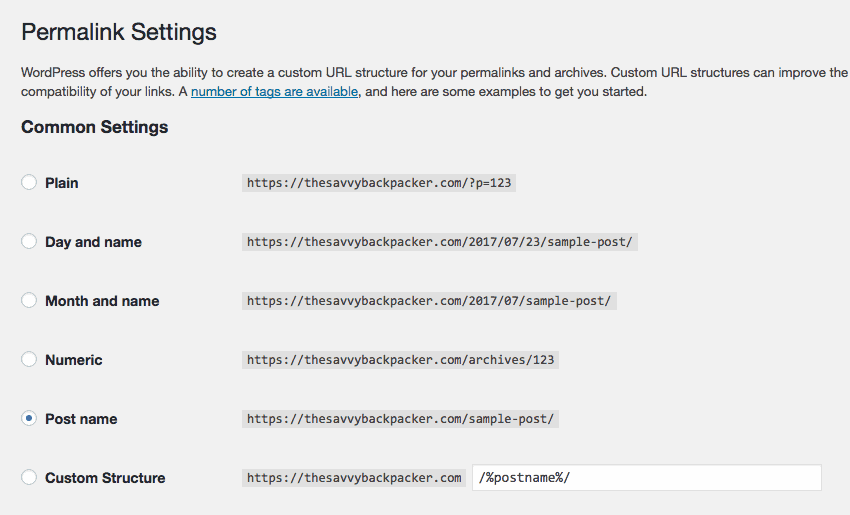
Next, click on Permalinks in the Settings Menu.
This is important.
This is where you’ll tell WordPress how to display your website’s link structure. You have multiple options but I use “Post Name” because it’s best for SEO. You want to do this right away because it is a huge pain to change later down the line.
OK at this point it’s time to move on to the next phase. Plugins.
Install WordPress Plugins
WordPress plugins are bits of software that expand the functionality and performance of your WordPress site. There are thousands of plugins available for WordPress and most are free.
Note: Plugins are developed by third-party software developers so quality control can be all over the place. Some plugins don’t play nice with each other, so you may discover that one plugin will make your site crash or load slowly. The plugins we recommend are all super popular and shouldn’t cause any problems but others could.
Also, don’t go crazy with plugins because they can many your site load slowly or even lead to security issues if you have a crazy amount installed.
Must-Have Plugins
These are the plugins that I think are essential. Start with these and then add others as needed.
- Akismet — The best way to prevent your blog from comment SPAM.
- Disqus Comment System — A robust comment system so your readers can leave comments.
- Google XML Sitemaps — Creates sitemaps which will help search engines like Google, Yahoo, Bing and Ask.com to better index your blog.
- Google Analytics by MonsterInsights — This plugin makes it simple to add Google Analytics to your WordPress blog so you can track your visitors.
- iThemes Security — Help keep your site safe from hackers.
- Jetpack — Is a mega-plugin that has all kind of features — like boosting your performance. One thing to note, only enable the features you need because enabling everything could hinder overall site performance.
- WordPress SEO by Yoast — The BEST all-in-one SEO solution for WordPress.
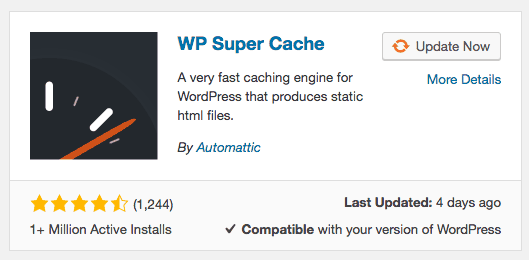
- W3 Total Cache or WP Super Cache — These two caching plugins help keep your page running quickly.
- Image Compression Plugin (see a bit below in the article)
Things to consider when choosing a plugin:
Check when the plugin was updated because plugins that haven’t been updated in months (or years) might cause issues with your site or be a security flaw. The number of installs and reviews is another good indication that it’s a quality plugin.
How To Instal Plugins
Installing plugins is easy. There are two ways to do it.
First, click Plugins on the left menu. Then click Add New.
Method One:
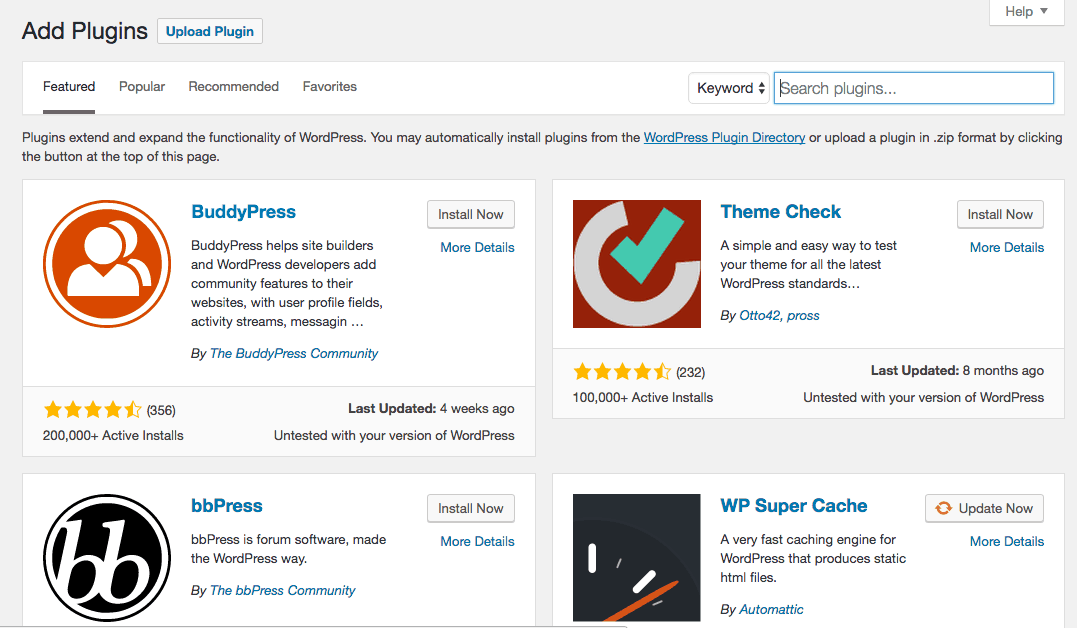
From the plugin page, you can search and install plugins. This is also a good place to discover the other popular plugins.
Use the “Search Plugins” box to find the plugin you’re looking for. To install a plugin all you need to do is click “Install Now” and it will take you through the installation process.
Method Two:
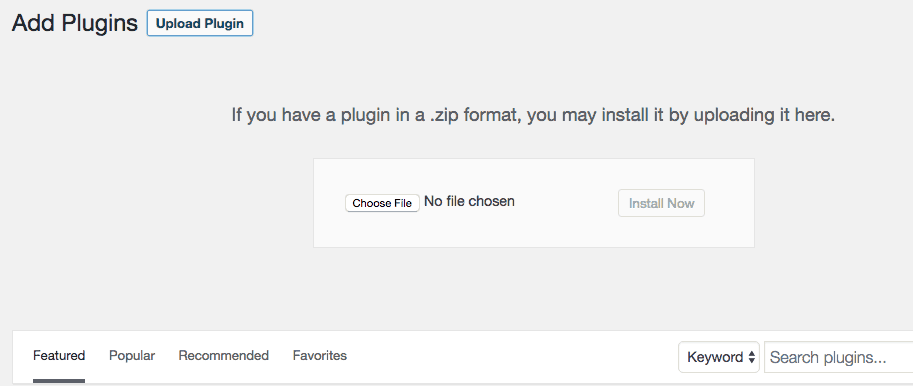
You can also download plugins from third-party developers or from WordPress.org and upload the zip file.
Activate and Configure Your Plugins
After you install each plugin you’ll need to activate and configure it — which is usually an easy process.
Click the “Installed Plugins” in the Plugins menu, find the plugin, and click Activate. You’ll often be prompted to configure the plugin.

Once you activate the plugin you can access it on the WordPress menu or sometimes it’s listed in the “Settings” menu.
Install A Backup Plugin
I made a separate section for backup plugins because it’s extra important to backup your website regularly — even if your web host offers backups it’s still smart to make your own. Why? Shit happens all the time. Servers crash. Hackers attack. Plugins cause major malfunctions. I know way too many people who have lost everything because they didn’t backup their website.
Here are the best backup plugins — there are both free and premium options:
- BackupBuddy (premium) — BackupBuddy is a super popular premium plugin that lets you schedule automatic daily, weekly, or monthly backups. The backups can automatically be sent to your Dropbox, email, or to their cloud storage. It costs a one-time $80 fee.
- UpdraftPlus (free and premium) — Updraft is another popular backup plugin that lets you schedule automatic hourly, daily, weekly or monthly backups. The backups can automatically be sent to your Dropbox, email, or their cloud storage. It also lets you revert to previous backups from the WP dashboard. There is a free version or of more robust pro version for $70.
- BackWPup (free and premium) — Does pretty much the same as the others. The premium version costs $69.
Optimizing WordPress
Google and your readers like websites that load quickly so here are some ways to help your site be as speedy as possible.
Important Note: Sometimes optimization plugins can cause issues with your site. After you install each plugin check your site to see if everything looks correct. Disabling the plugin will usually fix any problems that arise.
Caching Plugin
W3 Total Cache or WP Super Cache are two free plugins that will give you a big boost in performance — basically, a caching plugin saves a “static” version of your page to your server and serves this to your users which speed up load times. Just follow the prompts when configuring the plugins.
WP Rocket is a premium caching plugin that does an even better job than the two mentioned above and it has a few more features to help your pages load even faster. It costs $39.
NOTE: You should only run one Caching Plugin. Having two or more activated will cause a lot of problems.
Use A CDN (Content Delivery System)
A CDN is a service that stores your web files on multiple servers all around the world. What does this mean? Basically, when someone visits your site the CDN will serve the files from a server that’s closer to that user than your host. So, for example, someone in France visits your site the CDN will serve files from a server in the UK instead of Dallas, TX (or wherever your web host is located).
This is more of an advanced thing that new sites really shouldn’t have to worry about. That said, CloudFlare has a CDN free service that’s great for small sites. It also helps boost security so that’s nice.
If your site gets super popular you can look into getting a more advanced CDN but don’t worry about that at this point.
Optimize Images
Large images will kill your site’s performance so optimizing your images will give you one of the biggest performance boosts.
Many people simply drop an unedited image (which is multiple megabytes in size) into their blog but these huge will take forever to download (especially on mobile). It’s important to edit the image size down to something manageable.
I use an old version Photoshop to edit my photos. But if you’re just doing simple photo editing then Photoshop is a little overkill (note: Adobe now does a monthly service that gives you access to Photoshop and Lightroom for $10/month). You can also get Photoshop Elements for about $120.
There are also plenty of free photo editors that will get the job done. GIMP and Paint.NET are the two most popular.
There are a handful of plugins that will automatically compress and optimize your images — usually lowering file size between 20%-80% without noticeable loss in quality. All the plugins listed below have both free and premium version — but most free versions have a monthly limit.
Our favorites are:
NOTE: For best results, you should still reduce your image dimension size before uploading them to your WordPress. For example, I usually reduce my images to about 1200 pixels in width.
Other Optimizing Plugins
- Autoptimize — This plugin, when paired with a Cache plugin, does a solid job at tweaking and optimizing WordPress.
- Lazy Load For Videos and Lazy Load — these two plugins will stop WordPress from loading videos and images until they’re on the screen as opposed to loading everything all at once.
- WP Optimize — cleans and deletes junk files that can slow down your site.
Secure Your Website
WordPress does a lot of things really well but it does have problems from time to time with security and vulnerabilities. The best way to keep your site safe is to always keep WordPress and your plugins updated to the latest version.
Themes Security is a good plugin that will help secure common vulnerabilities that hackers use to gains access to your site.
The next step would be to use a service like Sucuri which constantly scans and protects your site for security issues and automatically cleans any infected files from your site. This is a premium service that starts at $200/yr so it might not be worth it for new sites. But once your site gets popular and starts making money it is probably a good investment.
And most importantly, MAKE REGULAR BACKUPS. You never know when your site might get infected so having a backup makes life a lot easier if you get attacked.
Google Analytics & Webmaster Tools
One important step in growing a blog is tracking the number of hits you receive each month so you’ll want to set up analytics. Google has you covered here.
First, go to Google Analytics and create a free account. Next, download the Google Analytics by MonsterInsights plugin — which makes it simple to add Google Analytics to your site.
The next step is to set up your website in Google Webmaster Tools. This not only helps Google crawl your website but it also helps you monitor your search results and website errors. It’s super easy to sign up.
Choose a Theme / Customize The Look Of Your Blog
Ok, now for the fun stuff… making your website look great. So let’s just right in with choosing a theme.
Be warned, you’re going to spend a ton of time making your site look how you want it. I spent countless hours finding my first theme and then I spend even more time tweaking and customizing it.
Don’t know anything about coding? No problem. Lots of themes are designed so you don’t need to know any technical stuff (but it does help if you know a little).
What Is a Theme?
A “theme” determines the look, feel, and design of your blog. Your design is your brand so it’s wise to spend time finding a theme that works for you. There are literally thousands of themes available (both free and premium) so you should be able to find something you like. You can also have a theme custom made for you by a designer/developer but that’s a little overkill for a new blogger.
Don’t worry, you can always change themes down the road. For example, I’ve changed my theme multiple times over the past few years. I started off with a free theme and then moved to a premium theme. Then I had a developer tweak that theme and then I had a designer and developer make a custom theme.
Free Themes
The best place to find free WordPress themes is within the WordPress dashboard. Go to the Appearance tab; there you will find all the free WordPress themes. From here you can select the theme you like, download them, and activate them to see how your site looks. You can also download free themes from various websites.
However, free themes do have some drawbacks. They’re often not updated (which can lead to security issues), they’re usually a basic version of a premium theme so they don’t have as many features, they can be buggy from poor coding, and you’re not going to get any support from the authors.
That said, some free themes can be completely fine but if you’re serious about creating a blog then a premium theme is usually worth the price.
Premium Themes
It’s amazing how good premium themes have become and they’re actually really affordable. And these themes make it super easy to make a really great looking website without knowing any design skills.
Most premium themes start around $50 and go up to about $200 (but I’d plan on spending around $60).
Premium themes come in all shapes and sizes — some are minimalist, some are designed for large beautiful photos, some let you drag-and-drop every element so you can customize your blog just how you like it. You can, and will, easily spend hours and hours trying to find the perfect theme.
Many of the most popular premium themes can be configured a dozen different ways so even someone with no coding skills can whip up a pretty impressive website — it just takes some time to learn how the theme functions.
Most of these paid themes also come with technical support that will help you solve basic issues with your theme.
Where To Get Premium Themes:
ThemeForest — ThemeForest is the biggest marketplace of premium WordPress themes. It’s where I purchased my first few themes and I was happy with the result. The most popular themes are all priced around $60. One note: any author can sell themes here so quality can vary. Before you make a purchase, be sure to check the author’s reviews because the better authors are more likely to write good code and update their themes.
StudioPress — StudioPress makes a lot of really well-coded, lightweight, and SEO optimized themes. With these, you have to purchase StudioPress’s Genesis Framework ($59) and then you purchase a separate theme (usually around $70) that customizes the framework. The good thing about StudioPress is that the theme + framework are constantly updated and optimized to run as well as possible.
Elegant Themes — Elegant Themes is another company that sells well-coded and feature-rich themes. Their drag-and-drop Divi theme is the most successful theme in history so that’s saying something. You can have access to their library for $89/yr or a lifetime access for $249.
Custom Themes
We use a custom theme at The Savvy Backpacker because it’s the only real way to get the site to look exactly like you want.
Unfortunately, it’s a lot more complicated of a process. I hired an experienced three-person developer team and it took about three months from start to finish (well, we’re still tweaking but you’ll see that you’re never really finished).
Expect to spend anywhere from $2,000-$10,000+. We got quotes up to $25,000 — which is crazy unless you’re making a ton of money and need a whole team to support you.
You also have to be careful with who you hire because cheap developers tend to give bad results. I’ve probably wasted around $2,500 on bad developers over the years. Live and learn.
But honestly, I wouldn’t bother with a custom site at first. If nothing else, you can hire a developer to make small changes to a premium theme (which shouldn’t be too expensive).
Keep Designing and Customizing
You’re going to spend hours and hours and hours trying to get your design just right. And let’s be honest… your website’s design will never be finished. I know I’m always going back to change small things here and there.
Logos & Graphics
You’ll probably want a logo or a well-designed header for your website. If you need some help then you’ll need to hire a designer.
Personally, I ask friends first because maybe they’d know someone who can create something for you.
There are also a handful of online companies where you can hire a designer. The bottom of the barrel is Fiverr where you can get a super basic logo for $5-$20 (don’t expect much). 99Designes starts at $299 and you get design submissions from around 30 designers. UpWork is a site with a lot of freelance designers — from cheap and crappy to very good but expensive.
Another good resource is Etsy because there a lot of people there who make pretty nice pre-made logos and headers — and the prices are solid (usually $15-$35). These logos are already pre-made (they’ll just add your blog name and maybe change some colors) but there a lot of solid options to choose from.
You can also email the owners of blog you like and ask them who they use.
Overall Design Considerations
When looking for a theme, logo, header, or banner it’s important to keep one thing in mind — simplicity. When it doubt choose clean and simple. Let your content shine.
Too many people go overboard with the design elements and things quickly become busy and cluttered.
Content Creating Strategies
At this point, your blog should be fine-tuned and ready to go, but now it’s time to start the most important part — creating content. In this section, I’ll talk about different strategies you might want to consider as you start writing and creating content.
Your Blog’s Path
There are a few different paths your blog can take. When it comes to travel blogging there are two main paths — journaling and how-to/informational articles. Both can be successful and both have their own challenges.
Most bloggers fall into the journal category. They give personal trip reports and post photos of their adventures as they’re traveling. This type of blog is great for showing your personality and telling entertaining/inspirational stories to your readers. These bloggers make a personal connection with their readers — which is always great.
However, there is one main problem with this type of blog… it takes constant updating to build an audience. And once the travel stops, these blogs usually die off. And once the blog isn’t updated anymore, most of the readers will also leave.
This is ideal long-term travelers that are abroad for an extended amount of time or expat writing about where they live. This gives them a long time to build an audience and generate content. Eventually, the most successful bloggers make enough off their blogs to pay for their travel so they can continue traveling.
Informational bloggers focus on giving practical information to other travelers. They write articles that are similar to what you’d find in guidebooks — like “the best castles to visit in Germany” or “how to bike from Paris to Amsterdam.” This information has a longer shelf-life, so someone reading the article two years after it was written will still find value in the information.
However, this information can be a little dull, it doesn’t have much personality, and it isn’t super fun to write. Additionally, you have to really know your subject matter in order to write in-depth articles that your readers will find helpful. Another downside is that it’s hard to build a long-term audience because readers are searching for one specific piece of information and once they find it, they’re gone.
Plus, long-established websites like Lonely Planet, Rick Steves, Rough Guides, etc. have already covered all this information (and they’ll do it better than you or I ever can).
The most successful travel bloggers have hybrid blogs — which combine both the journalistic trip reports and more in-depth informational articles. This is what you should eventually shoot for because you’re able to make a personal connection with your readers by blogging about exciting day-to-day travel and you’re also able to use your expertise to create informational articles that help your readers plan their trips.
It’s not easy to start a hybrid blog. Often a blog will start off as a trip journal and then morph into a hybrid as the blogger becomes more of an authority in their niche. I think it’s safe to say that all the most well-known travel writers fall into this category.
Write About What You Know and What Interests You
Bloggin’ ain’t easy. Blogging about what you don’t know is extremely difficult. That’s why you should stick with what you know. Plus, if the information you’re writing about is interesting to you, you’ll be much more likely to stick with it.
Pick a Niche
You’ll hear this a lot from experienced bloggers.
There are thousands of people blogging about their travels — most are the typical “follow me as I travel around.” This is a perfectly fine path to take but you’ll be competing with thousands of other similar (and many established) blogs. This will make it difficult to stand out or gain popularity.
The key is to target a specific niche. Targeting a niche is smart because the more you focus on your area, the better chance you’ll be seen as an expert in your field. Basically, it’s easier to control a large chunk of a smaller pie than control a tiny sliver of a huge pie.
The ultimate goal is to become so much of an authority figure that you become the best place to learn about that niche. People trust experts because experts know what they’re talking about. For example, if I’m going to Berlin, I want to read a blog from someone who really knows that city — not someone who spent three days there as he traveled around the world.
There are hundreds of niches.
I only really blog about backpacking/budget travel in Europe. David Lebovitz blogs primarily about French cooking and traveling around France/Paris. The Sartorialist has become world-famous for taking photos of fashionable people all across the world. Both these writers focused on one core subject and now they get hundreds of thousands of visitors.
You can focus on anything — ultra-low budget travel in Europe, luxury travel in Europe, foodie travel blogging, traveling with kids, biking across Europe, traveling as a couple, solo-female travel, budget baby-boomer travel, vegan travel in Europe, blogging about European street fashion and interior design. If you are super familiar with a city or destination, you can focus on a single topic for a single city — like budget travel in Amsterdam for example. Lifestyle blogs are also super popular these days, so you could create one that has a strong travel theme.
Travel lifestyle blogs are also super popular these days and they give you a little more wiggle room to vary up your content.
Remember: If you’re interested in a subject, there is a pretty good chance a lot of other people are interested in it as well.
Tips For Picking a Niche:
- Blog About Your Passion — You’ll never stick with your blog if you’re not writing about something that interests you.
- Your Niche Needs an Audience — Picking a focused niche is good, but choosing a niche with a tiny audience probably isn’t a great idea. This probably won’t be an issue for most people, but it’s something to be aware of.
- Research The Competition — Don’t get too concerned about other people in your niche, but you should take a look at your competition. If the top person in your niche is a juggernaut in the blogging world, then it’s good to know what you’re going up against. Study them. Find their weaknesses. Or you can see what they’re doing right and try to do it better.
- Can You Write About it for a Long Amount of Time? — Make sure your niche provides enough content to write about or you’ll have nothing to talk about after just a few articles.
- Budget Travel Doesn’t Earn a Ton of Money — Take it from me, there is only a little bit of money to be made in budget travel but there is a lot more to be made in normal travel and luxury travel.
Search Engine Optimization (SEO)
Search Engine Optimization (SEO) is a tactic that helps your articles get on the front page of Google’s search results.
This ain’t easy. The competition is fierce. Getting on the first page of the search results will give you a huge boost in traffic and becoming the first result in Google is like winning the lottery.
Remember, getting your pages ranked takes a lot of time. Some of my posts have taken 12-18 months before they showed up on the first or second page in Google. So have patience.
Personally, I use this guide from Yoast as my roadmap. Just follow it step-by-step and you’ll be in better shape than 85% of the other bloggers out there.
Our SEO Tips and Strategies
Learning about SEO can quickly suck you in and leave you scratching your head. Why? Becuase it’s a bit of a guessing game to what works. There are tons of self-proclaimed “experts” out there trying to sell you something but I suggest not listening to them.
My strategy is to keep it simple — stick with the basics and don’t overthink it. Don’t try to game the system or look for shortcuts. Spend your time making great content. You’ll be better off in the long run.
Install YOAST SEO WordPress Plugin
Yoast SEO WordPress plugin is the most comprehensive SEO software and it’s totally free (it’s also the most downloaded WordPress plugin of all time).
Write Post Titles Like People Search
When naming your post I recommend writing it the same way someone would search for it. For example, if someone is searching for the best day trips from London then make your titles “best day trips from London.” Get inside the mind of your reader.
Exception: if you’re writing an opinion piece that is more suited to go “viral” then you want to make your title as catching as possible — don’t worry about pleasing the search engines. Why? Becuase these are intended to be passed around Facebook, Twitter, etc. For example, I wrote a sarcastic/humor article called “Why Traveling Abroad In Your Twenties Will Ruin Your Life” that
For example, I wrote a sarcastic/humor article called Why Traveling Abroad In Your Twenties Will Ruin Your Life. There is nothing SEO about it but it went crazy on Facebook and got a ton of hits.
Write URL Slug Like People Search
This is the same concept as above. When making your article’s URL slug keep it similar to your title. So for “best day trips from London” your URL should be your-site.com/best-day-trips-london. A lot of people make non-specific URLs like your-site.com/where-i-visited-when-staying-in-london or something similar.
A direct and simple URL (like the first one) tells Google exactly what the article is about. The second URL is too ambiguous for Google to totally understand.
Use Headings To Organize Your Articles
Headings tell Google what’s most important in the article.

- Heading 1: This is the title of the article. A lot of people say to only use one Heading 1 in your article.
- Heading 2: This is this main supporting points in your article. For the sake of SEO, I try to repeat the title of my article “i.e. best day trips from London) in a Heading 2.
- Heading 3,4, 5, & 6: These are just more ways to organize your article and help Google what your article is about.
Repeat Your Page Title In Your Article
Try to naturally work in your page title (and a few variations) into your article. Don’t go overboard because Google doesn’t like that and your readers will get annoyed.
SEO Title and Meta Description
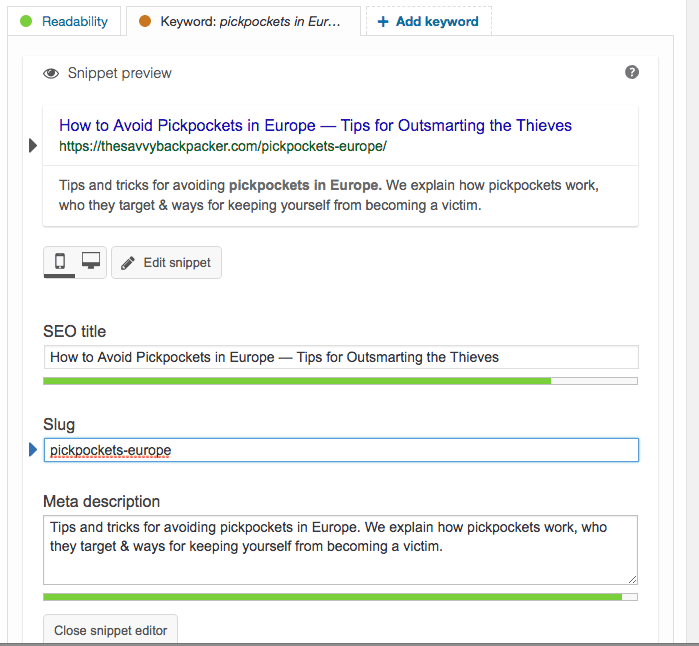

Scroll to the bottom of your articles and you see an area to edit the SEO Title and Meta Description. This is basically how your site is going to appear in the google results so craft the Meta Description to entice people to click.
Image SEO
You can also get a little SEO boost with your article images. Make sure your title, alt text, and description reference your article. Be sure to use different alt text and description for your images as keeping the same one looks spammy to Google. I use my article title as the alt text and description for my main image and then do variations for the other images.
Long Content = More Keywords
Long articles tend to do better in Google’s search results because it gives Google more keyword opportunities to attract searchers. Plus, Google always wants to return the best results so long articles tend to have the most in-depth information.
We rarely write anything under 1000 words but many of our articles are closer to 3,000-6,000 words.
How To Make Money With Your Blog
I apologize if I sound like a broken record, but making money with your travel blog isn’t easy. There are other subjects that will bring in a lot more cash — like fashion, makeup, mommy/dad blogs, and tech.
I can also guarantee that you won’t be able to stay motivated if you’re mainly interested in making money — especially because it’s nearly guaranteed that you’ll have to work for two years before you start making any.
That’s why you should initially focus on creating a blog because you love to travel. Then, once you have a kick-ass blog, you can start finding ways to monetize your site.
How much can you earn from your travel blog? Most people will only make a few dollars a month, but I know of a handful that make over $100,000/yr. Personally, it took me about three years before I started making a few hundred dollars a month, so I still can’t afford to buy that yacht and private jet — but I’m working on it.
Below is a list of the most popular ways that travel bloggers use their blog to make money:
Display Advertising (Banner Ads)
Banner ads are the easiest way to earn money from your site. All you do is slap them up and watch the pennies and nickels come rolling in. So yeah, banner ads don’t really pay much because people don’t really click banner ads. I mean, when is the last time you clicked one? The only real way to make much money is to have a ton of traffic — it’s really just a numbers game because the more people visiting the site, the more likely someone will click one.
You have to be careful because if you plaster your site in banners, your readers will get annoyed and not come back.
I use Google Adsense for the few banners I have on my site. They pay the best, so I wouldn’t bother using any of their competitors.
After you website gets around 25,000 visitors a month then you can drop Google Adsnese and sign up with a more specialized third-party banner network like Mediavine or AdThrive — these pay way better than google.
If your site gets super popular, you can sell your banner ad space directly to companies for a flat monthly fee for a lot more money. Usually, companies will contact you, but feel free to reach out to them if you want.
Affiliate Sales
Affiliate sales are another popular way for bloggers to earn money. The idea behind affiliate sales is simple — you get a small commission when someone buys a product that you link to. For example, you post a link to Hotels.com and your reader clicks that link and then books a hotel stay worth $1,000. You would then get a small percentage (usually around 3%-5%) of the sale as a commission.
In theory, this is a good system, but most merchants hardly pay anything. For example, I only make a $6 commission on selling airfare — even if it is a $3,000 sale. Smaller ticket items, like a $15 guidebook, will only bring about $.90, so this is a slow way to earn your fortune. Scummier things like getting people to sign up for credit cards pay a lot more, but the competition for credit cards is huge (and I feel a little unethical pushing credit cards).
Additionally, the reader has to make the purchase soon after they click the link (usually 24 hours – 15 days) or the sale doesn’t count. This window to make the sale is getting smaller every year.
Affiliate sales can be fairly lucrative if you’re getting 300k visits a month, but don’t expect to get rich if you receive 2k visits a month.
The biggest affiliate networks are CJ Affiliate by Conversant, AvantLink, and LinkShare. These sites represent the affiliate programs for companies like REI, STA Travel, Hotels.com, Expedia, RailEurope, HostelWorld, The Gap, and a ton more. Amazon is another huge retailer with their own affiliate program.
Don’t be afraid to reach out to companies that you think are a good fit for your audience — many times they already have an affiliate program that you can join.
Make and Sell A Digital Product
One of the most popular ways to make a good amount of money is to create your own product — usually an ebook or an app. You’ve probably seen tons of bloggers offering to sell all kinds of ebooks and now you know why.
One of the most popular topics to write about is how to make money with your travel blog. Wait a minute… I should make this post into an ebook and sell it for $15. Ohh well, I guess I’ll just give away this valuable information for free and stay poor forever.
But seriously, selling ebooks is great because you keep a huge amount of the profit and there are no recurring costs. For example, with Amazon, the author keeps 70% of the sale of ebooks, so that $10 book earns the author a sweet $7. That may not seem like a huge amount, but what if you sell 100 books? What about 500? What about 1,000? It can really add up.
If you sell your book directly through your own site, you keep 100% of the profit.
You can create an ebook on just about anything that you’re an expert in — city guides, blogging, travel planning, travel hacking, travel with pets, marketing, social media.
A lot of blog owners will have three or four books.
Writing ebooks is great because you only have to do the work once. You write it and then you collect the money each time it sells. This is called passive income. It’s the holy grail of making money online, but it is super tough because the competition is high.
But don’t think that all you need to do is throw a book on Amazon and then watch the money roll in. A successful book takes a lot of self-promotion. That means you need to have a popular blog so you can drive more people to your books.
YouTube Advertising
If you’re good with a video camera and editing, you can earn money by posting videos on YouTube. You’ll have to get a lot of views, but if your video goes viral, you can earn a few hundred to a few thousand dollars from the ads that YouTube places on/before the videos.
Don’t expect crazy money, but if you produce a lot of solid content, you may be able to earn a few hundred dollars a month. For reference, I have a friend who earned about $5,500 from a video that got about 4 million views.
YouTube is also great because it will drive people to your website which can help boost all your other advertising methods and raise your “brand” image to the rest of the travel world.
Sponsored Posts
Companies may eventually ask you to post about a product or service and they’ll pay you. Popular bloggers can charge $200-$500+ per post, but it takes a long time before you get to this level.
Unfortunately, your loyal readers won’t like these posts too much since it doesn’t seem genuine.
Google is also starting to treat sponsored posts similarly to selling links (see below) so I’m not sure how much of a long-term strategy it is.
Selling Links
First off, I highly recommend that you don’t do this.
OK, here is the 411 on selling links. One of the main factors that Google uses to determine if a website is a quality site is by how many other sites link to it. The reasoning is that people will share the best sites and they won’t share the crappy sites. Google uses this info to help determine what pages get shown in the search results.
A lot of online marketers will purchase links in order to game the system so that Google will display their page higher in the search results.
Buying and selling links is against Google’s rules and they will penalize sites that break their rules.
It can be tempting to sell links. I know of one blogger who made around $5k/month (for a few months) by selling links. However, if Google catches you, your site could get penalized to the point where it won’t show up in the search results — which is bad.
Make Multiple Sites
Want to know a secret? Most of the most successful travel bloggers run multiple websites. They have their main site, then they’ll also make a few smaller niche sites. Each site alone doesn’t make a ton of money but multiplied by three or four (or more), they start earning a decent amount of cash.
This does take a lot of work, but it’s also a good way to safeguard yourself in case one of your sites stops performing.
Press Trips
Tourists boards are always looking for good press, so many of them invite bloggers on trips to their country. Often they’ll pay for food, lodging, and activities. Sometimes they’ll even pay for airfare. These trips can be a cool way to travel, but you’re often working so much that you don’t have a lot of time to enjoy it. You should view these trips as work and not a vacation. Additionally, these trips can sometimes feel a little inauthentic because you’re being led around by a tourism board.
On the other hand, some tourists boards are much more open and relaxed about the whole thing and they’ll give you more freedom to do what you want.
Tourists boards want a lot of bang for their buck, so don’t expect to get any press trips until you have a fairly large readership.
Public Speaking
Once you get popular, people may want you to speak to large crowds about travel and they’ll pay you. Obviously, you’ll need some public speaking skills. Additionally, this level of fame takes many years of blogging and a lot of travel before you’ll be asked to share your wisdom.
Freelance Writing
If your writing is really good, other travel publications may ask you to write for them. The pay for travel writing isn’t very good. Even established, full-time writers probably only make about $50,000/year (not including a bunch of free travel perks), but it takes a long time to get to that level. Even articles published in big name magazines like Travel and Leisure may only pay around $100-$200.
Ohh, and publications are notorious for taking 6-12 months before they’ll send your payment. Ouch.
As you’ve seen, there are multiple ways to make money from your site. Each method probably won’t pull in a ton of money on its own, but when you combine each method, you can start earning a decent amount of money.
Next Steps For Taking Your Blog To the Next Level
Secure Your Social Media Accounts
Social media is super important, so you want to secure all your social media sites ASAP. I highly recommend Facebook, Twitter, Instagram, and Pinterest.
Pinterest can really be a big source of traffic so spend some time learning about how to best use the platform.
Set Up an Email List
Email is a great way to create a long-term relationship with your readers, so it’s smart to create an email list. In fact, many online marketing experts say that having a great email list is one of the most important things you can do to drive repeat traffic to your site. The two best services for creating email campaigns are AWeber and MailChimp.
Move Somewhere Cheap
If you look at the most famous travel bloggers, you’ll start to see something similar… most of them live someplace super cheap. That’s because it’s pretty easy to live in places like Southeast Asia for $1000/month. If you remember from earlier, travel blogging doesn’t pay a lot of money.
If you start making closer to a “normal” US salary while living someplace cheap, then you’ll really be able to save a lot of cash — way more than if you were living in the US or Western Europe.
I know a lot of people who live in places like Thailand and then spend three or four months traveling around Europe every year.
But you can even live cheaply in Europe! Berlin in the cheapest capital city in Europe and it has great connections to the rest of the continent. Even Spain and Greece can be very affordable (although it’s still considerably more expensive than SE Asia or S. America).
Keep On Blogging
Once you’ve mastered all this you’ll have picked up a lot of information and you’ll become somewhat of a blogging master yourself. Here are some more tips that you might want to look into:
- Create an LLC & Talk With An Accountant: Once your website starts taking off and making money we suggest meeting with an accountant. They’ll have tips on saving money on taxes and whatnot.
- Hire Some Writers: More content = more visitors so consider hiring an extra writer or two to grow the site.
- Attend Conferences: There are a bunch of travel conferences and these are a great way to meet industry professionals and other bloggers. And this might lead to future opportunities.
- Update Old Articles: There is a good chance your early articles will be crap — I know ours were. So don’t be afraid of updating your posts.
PIN IT:

No Funny Business
The Savvy Backpacker is reader-supported. That means when you buy products/services through links on the site, I may earn an affiliate commission—it doesn’t cost you anything extra and it helps support the site.
Thanks For Reading! — James
Questions? Learn more about our Strict Advertising Policy and How To Support Us.

